This Blog Project
If you looking to setup your static website, I recommend you to read here instead.
As you may have already seen in the footer, this blog is made with Hugo.io and I’m using the Minimal theme with it. Hugo is a static site generator made with Go, my main reason for using it instead the compettitors is that at this time its performance looks to be the best, I also have some knowledge of Go if I ever need to do something more complex with it, and also the community behind it looks very active.
You will find some articles about hosting Hugo in some free hosters, which I would also recommend, in general, deploying it to Github is really easy and you already have a SSL certificate there, Gitlab is also another choice, but you will need to generate your own certificate.
I’m hosting it in Digital Ocean, I plan to have some other “free” projects hosted there, so I’m just using the same Droplet for them and having Nginx to deal with it.
For Hugo development you should check their guide, if you choose to use some made theme you will have your site ready to be deployed in less than 5 minutes, also read Github’s Markdown guide to know how to write your text. For deployment I’m using their rsync guide, using the code bellow, after you generate your executable you just need to run “./file-name”, in your terminal, to deploy your new change to the server. As I won’t be doing it daily I find that this is a good enough solution.
|
|
Something to keep in mind is that the “DIR” starts from root “~/” so if your files folders aren’t in root you must change the path, ${USER}@${HOST}:/home${DIR}, for example, check your system path, which must be the same folder pointed by Nginx.
Digital Ocean hosting
So after you have your deployment set and something ready to be shown, you must prepare your Droplet and your Nginx setup. First you will need to point Digital Ocean for your DNS provider in the Registrars you bought your domain, here is the official Digital Ocean guide to do it. It may take some minutes to work. You can already create your Droplet, the cheapest one will probably be enough, I got mine with Ubuntu, but do as you please. Them go to their Networking tab, you will start in their “Domain” page, add your @ domain, “giovanialtelino.com”, and not “www.giovanialtelino.com”, for example. Click to manage it so you will setup the DNS records, see my picture bellow.
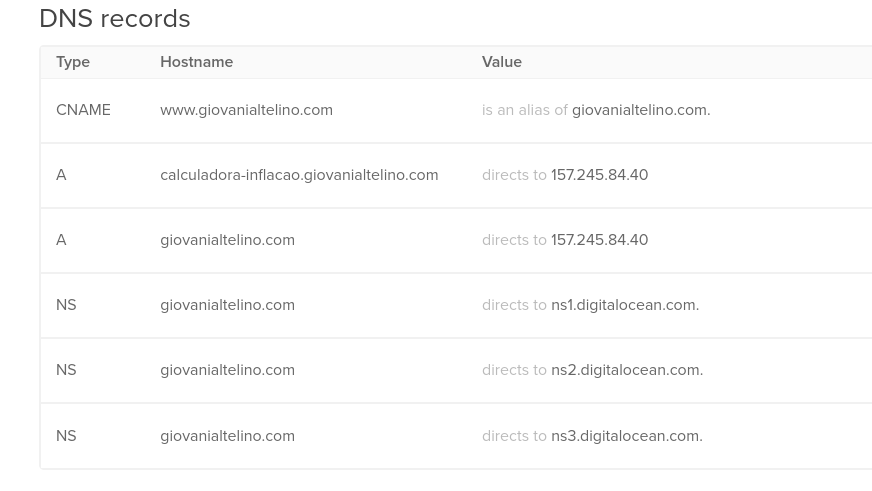
I’m using a CNAME to map the www entry to the @ and them mapping my @ to the Droplet IP (which you will select by name on the “will redirect to” option). I’m also sending another subdomain to his droplet, that will be used for another simple project, which will be dealt with in Nginx. Keep in mind that I’m using the same domain because it’s a non profit project that I don’t expect most people to use, so I’m not interested in maintaining another domain.
Well after that you are pretty much ready to configure Nginx.
Nginx and Further configurations
I’ll leave a guide here for Nginx, which I find really clear and easy to understand, just remember to modify your rsync file to point to the same folder you will use for Nginx, and also, don’t forget to add HTTPS only, it’s on the guide and it’s super easy.
As a last tip, when you’re configuring your ufw and you want to keep your ssh connection you must use the command ufw allow OpenSSH to not lose your connection to the droplet, if you forgot about it you need to use the internal console in Digital Ocean website to add this new rule, if you don’t do it rsync will be blocked and you need to use some other way to deploy.
If you need something just call me on Twitter.